

This post may contain affiliate links, meaning I may earn a commission if you make a purchase, at no extra cost to you. I only recommend products I trust. Thank you for your support.
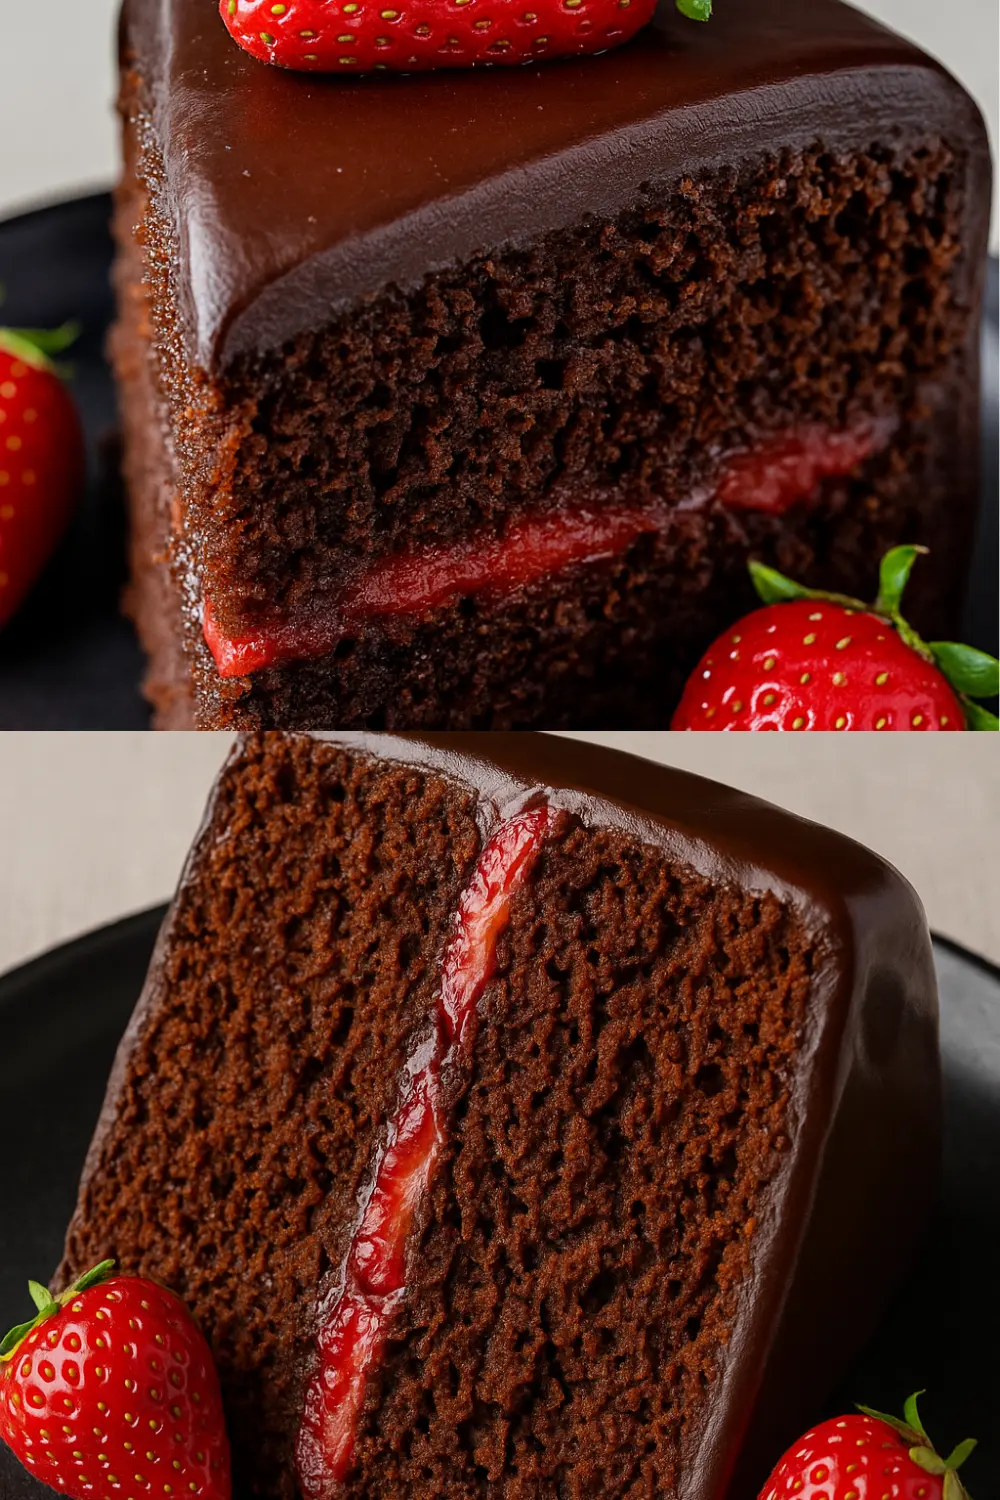
This easy chocolate strawberry birthday cake features two moist chocolate cake layers, a luscious strawberry compote filling, and a silky chocolate ganache drip.
Adorned with fresh strawberries, this simple birthday cake is stunning, serves 12, and makes the perfect dessert for any celebration.
Every bite of this cake is a celebration of texture and flavor, from the tender crumb to the gentle tang of fresh strawberries and rich chocolate finish.
No need for fancy techniques or elaborate decorations, this happy birthday cake shines with its rich flavor, perfect balance, and effortless beauty.
It may look like something you’d buy from a fancy bakery, but this birthday cake is surprisingly simple to make at home.
Whether you’re celebrating your 18th birthday or simply craving a cheerful treat, this chocolate strawberry cake delivers pure joy in every bite.
The best part? You can create this chocolate strawberry birthday cake without pro-level skills, just a few basic steps, and you’ll have a dessert that impresses every time.
✅ Take a moment to read through the whole post first; you’ll pick up expert tips, handy equipment guides, and step-by-step details to help everything turn out perfectly. The full recipe is right below!
Key Ingredients for Your Chocolate Strawberry Birthday Cake
For this simple chocolate strawberry birthday cake recipe, here are the key ingredients and why they matter:
1. All-Purpose Flour
- While some recipes call for specialized cake flour, this recipe proves that standard all-purpose flour works beautifully for a tender crumb.
- Using the “spoon and level” method is crucial here; it prevents over-packing the flour, which can lead to a dry, dense cake.
2. Unsweetened Cocoa Powder
- This is where the deep, rich chocolate flavor truly comes from.
- The quality of your cocoa powder significantly impacts the cake’s taste and its beautiful dark hue.
3. Baking Powder and Baking Soda
- These are your cake’s leavening agents, working in tandem to give it that perfect lift and airy texture.
- Baking soda reacts with acidic ingredients like Greek yogurt and espresso powder, while baking powder provides a secondary boost, ensuring a tender, well-risen cake.
4. Granulated Sugar and Light Brown Sugar
- The combination of these two sugars is intentional.
- Granulated sugar provides sweetness and structure, while light brown sugar, with its molasses content, adds a subtle caramel note and helps retain moisture, contributing to a softer, more tender cake.

5. Large Eggs (plus one extra egg yolk)
- Eggs provide essential structure and richness.
- The inclusion of an extra egg yolk is a chef’s secret for enhancing moisture and creating a sturdier crumb that holds up beautifully when frosted.
- Ensuring all eggs are at room temperature is vital for them to emulsify properly with fats, leading to a smoother, lump-free batter.
6. Vegetable Oil
- A neutral oil like canola or sunflower helps keep the cake moist without adding any unwanted flavor, letting the chocolate and strawberry truly shine.
7. Whole Milk
- Milk adds moisture and contributes to the cake’s overall tenderness.
- Like the eggs, using room temperature milk ensures it blends seamlessly into the batter.
8. Full-Fat Greek Yogurt
- This is a true secret weapon for moisture and tenderness. Its acidity reacts with the baking soda to provide extra lift, resulting in an incredibly soft cake.
- If Greek yogurt isn’t on hand, full-fat sour cream is an excellent substitute, offering similar benefits.
9. Vanilla Extract
- A classic flavor enhancer that rounds out and complements the rich chocolate notes in the cake.
10. Espresso Powder
- Don’t let the name fool you, this doesn’t make your cake taste like coffee.
- Instead, espresso powder acts as a powerful flavor enhancer, intensifying the chocolate notes and making them richer and more complex.
11. Bittersweet Chocolate
- For the cake, chopped bittersweet chocolate adds pockets of melted richness, contributing to its moistness.
- For the ganache, using high-quality chopped chocolate bars (not chocolate chips) is critical for a smooth, glossy, and professional-looking drip, as chips contain stabilizers that can hinder a perfect melt.
12. Fresh or Frozen Strawberries
- Both fresh and frozen strawberries work well for the compote filling.
- If you’re using frozen, just make sure to thaw them completely and drain off any excess liquid, as this helps prevent the strawberry compote from turning out watery.
13. Fresh Lemon Juice
- Preferred over bottled, fresh lemon juice provides a vibrant, tart flavor that brightens the strawberry notes and prevents the strawberry compote from being overly sweet, creating a perfect balance.
14. Cornstarch
- Cornstarch is combined with water to create a “slurry.” This mixture is vital for thickening the strawberry compote evenly and preventing lumps.
- Adding cornstarch directly to hot liquid can cause clumps, so dissolving it in cold water first ensures a smooth, consistent texture.
15. Heavy Cream
- This liquid component combines with the chocolate to form the ganache.
- The ratio of chocolate to cream is key to achieving the desired pourable consistency for a perfect drip.

Essential Tools for This Simple Birthday Cake
Having the right kitchen tools makes the baking process smoother and more enjoyable, contributing to a professional-looking result:
- Two 8-inch Round Cake Pans: These are ideal for creating two evenly sized cake layers, which are crucial for stable stacking and a beautiful presentation.
- Parchment Paper Rounds: Used to line the bottom of your cake pans, these are for ensuring your baked cakes release cleanly and effortlessly, preventing sticking and tearing.
- Nonstick Baking Spray: For generously greasing your pans, providing an extra layer of protection against sticking.
- Large Mixing Bowls: Necessary for separating dry and wet ingredients.
- Whisk: Essential for thoroughly combining dry ingredients and for the initial mixing of your wet ingredients, ensuring everything is evenly distributed.
- Rubber Spatula: Essential for gently folding batter (to avoid overmixing) and scraping down bowls.
- Medium Saucepan: You’ll use this for preparing the vibrant strawberry compote filling and for gently heating the heavy cream for your chocolate ganache.
- Small Bowl: Perfect for whisking together the cornstarch and water to create a smooth slurry for your compote, preventing lumps.
- Wire Cooling Racks: Crucial for allowing cakes and compote to cool completely and evenly, preventing condensation and sogginess.
- Offset Spatula or Bench Scraper: Indispensable tools for spreading frosting smoothly on the cake layers and sides. A bench scraper helps achieve sharp, clean edges.
- Squeeze Bottle or Piping Bag: Optional but highly recommended for applying the ganache drip with precision, creating clean, even drips.
- Cake Turntable: Optional, but incredibly helpful for effortlessly rotating the cake during frosting and decorating, leading to a smoother buttercream surface.
- Kitchen Scale: Highly recommended for the most accurate and consistent results, especially when dealing with the precise ratios needed for ganache, a kitchen scale is invaluable.

Tips for Making the Best Chocolate Strawberry Cake
These are the little details that make all the difference, the nuances that turn your happy birthday cake into a masterpiece every single time:
1. Use Quality Ingredients
- Use high-quality unsweetened cocoa powder and bittersweet chocolate (around 60% cacao) for a deeper, richer chocolate flavor.
- And when it comes to strawberries, ripe, juicy ones will make your compote taste far better than underripe or bland berries.
2. Use Ingredients at Room Temperature
- Cold ingredients don’t mix well with fats and can ruin the texture of your batter or frosting.
- Be sure your eggs, milk, butter, and yogurt (or sour cream) are all at room temperature before baking.
- This small step helps everything blend smoothly, giving you a fluffier cake and a creamier, lighter buttercream.
3. Mix Batter Gently
- When combining the wet and dry ingredients, stop mixing as soon as everything is just incorporated.
- It’s okay if you still see a few small flour streaks.
- Overmixing can make the cake dense and tough.
- A rubber spatula is great for folding in the last bits gently.
4. Nail the Ganache Drip Temperature
- Too hot and the ganache runs too thin; too cold and it’s too thick to flow.
- Aim for a syrupy, pourable consistency, like warm fudge sauce.
- Always test a drip on the side of a bowl or plate first to make sure it’s just right.
5. Dry the Strawberries Completely
- If you’re decorating with fresh strawberries, make sure they’re firm, ripe, and completely dry before placing them on the cake.
- Even a little water can ruin the look by making the ganache seize (become grainy and stiff) or turning the berries dull and soggy.
Why You’ll Fall in Love with This Happy Birthday Cake
Here’s why you and your loved ones will absolutely adore this simple chocolate strawberry birthday cake:
- Decadent Chocolate Base: Each bite delivers a rich, moist chocolate cake that’s full of deep cocoa flavor, intense but never overpowering.
- Fresh Strawberry Twist: The sweet-tart juiciness of real strawberries adds a refreshing contrast to the chocolate, making every layer pop.
- Luscious Ganache Drip: This silky, glossy chocolate ganache not only looks gorgeous but also adds a luxurious, melt-in-your-mouth finish.
- Simple Yet Stunning: It’s visually impressive with minimal effort, making it perfect for birthdays, yet approachable for beginner bakers.
- Customizable: Use fresh or frozen strawberries, adjust sweetness to your liking, and decorate it with your personal birthday flair.
- Loved by All Ages: Whether it’s for kids or adults, this birthday cake brings joy and nostalgia to any celebration table.
Final Remarks
Birthdays come once a year, but the joy of a homemade birthday cake lasts well beyond the last slice.
This simple chocolate strawberry cake brings comfort, celebration, and a little sparkle to the table.
Make it, share it, and savor every bite with the ones who matter most.
From the tender crumb to the glossy ganache, every step brings you closer to a beautiful cake, and an even better memory.
Happy Birthday!

Simple Chocolate Strawberry Birthday Cake
This easy chocolate strawberry birthday cake recipe serves 12 and delivers a perfect blend of rich chocolate flavor, sweet strawberry compote, and silky ganache.
Ingredients
Dry Ingredients
Wet Ingredients
For the Strawberry Compote Filling
For the Chocolate Ganache
For Garnish & Decoration
How to Make Chocolate Strawberry Cake (Step-By-Step Instructions)
Prep for Baking
- Preheat your oven to 350°F (175°C) to ensure your cake bakes evenly from the start.
- Grease two 8-inch round cake pans with nonstick spray.
- Line the bottoms of each pan with parchment paper rounds.
- Lightly spray over the parchment and dust with flour or cocoa powder to prevent sticking.
- This extra step helps your cake layers come out clean and intact with no tearing or breaking.
Mix the Dry Ingredients
- In a large mixing bowl, combine the all-purpose flour, unsweetened cocoa powder, baking powder, baking soda, and salt.
- Whisk everything together until well combined and the mixture is uniform in color.
Make the Cake Batter
- In a large bowl, beat the eggs and both sugars with an electric mixer or hand whisk until light and creamy.
- Add the extra egg yolk, vegetable oil, whole milk, full-fat Greek yogurt (or sour cream), and vanilla extract.
- Mix well until smooth and fully combined.
- In a separate (even larger) bowl, combine the dry ingredients.
- Gradually add the dry mixture to the wet ingredients in two batches.
- Gently whisk until just combined, do not overmix.
- Stop stirring as soon as you no longer see dry flour.
Add the Espresso Powder
- In a small bowl, dissolve the espresso powder into the hot boiling water.
- Immediately pour this hot mixture into the cake batter.
- Stir gently just until combined.
- Fold in the finely chopped bittersweet chocolate, mixing just enough to spread it throughout the batter.
Fill the Pans With the Cake Batter
- Divide the cake batter evenly between the two prepared 8-inch round pans.
- Gently tap each pan on the counter a few times to pop any air bubbles.
- If you have cake strips, wrap them around the pans.
- These help the cakes bake flat and prevent doming in the center.
Bake to Perfection
- Place both cake pans on the center rack of your preheated oven.
- Bake for 25 to 30 minutes, or until the edges of the cakes gently pull away from the sides of the pans.
- You'll know the cakes are ready if a toothpick inserted into the center comes out with just a few moist crumbs attached.
- Begin checking around the 25-minute mark to avoid overbaking, which can lead to a dry cake.
Cool the Cakes
- Once the cakes are baked, remove the pans from the oven and place them on a wire rack.
- Let them cool in the pans for 10 to 15 minutes, as this helps the cakes firm up slightly for easier handling.
- After that, gently invert the cakes onto the wire racks and allow them to cool completely.
Make the Strawberry Compote
- If you’re using frozen strawberries, make sure they are completely thawed first.
- Then, drain off any excess liquid.
- This is important because thawed strawberries can release a lot of water, and if that liquid isn’t removed, your compote may turn out thin and watery.
- After draining, chop 3 cups of strawberries into small, even pieces.
- This helps them cook down evenly and gives your filling a slightly chunky, delicious texture.
Simmer the Strawberry Mixture
- In a medium saucepan, add the chopped strawberries, granulated sugar, and fresh lemon juice.
- Stir everything together well so the sugar starts to coat the fruit evenly.
- Place the saucepan over medium-low heat, and stir continuously as the mixture heats up.
- Keep stirring until the mixture starts to gently simmer.
Make the Cornstarch Slurry
- In a small bowl, mix the cornstarch and water.
- Whisk well until the cornstarch is fully dissolved and the mixture is smooth with no lumps.
- This simple step creates a slurry, which will help thicken the strawberry compote without clumping when added to the hot mixture.
Add the Slurry to the Strawberry Mixture
- Slowly pour the cornstarch slurry into the simmering strawberry mixture while whisking.
- Keep whisking constantly to make sure everything blends smoothly.
- Let the mixture come to a gentle simmer and cook for about 1 minute.
- You’ll notice it thickens up quickly.
- It should look like a rich, chunky sauce when it’s ready.
Let it Cool and Set
- Take the saucepan off the heat and let the strawberry compote cool completely at room temperature.
- Once cool, transfer it to a bowl and press a piece of plastic wrap directly onto the surface, as this keeps a skin from forming on top.
- Chill the compote in the refrigerator.
Prepare the Chocolate Ganache
- Finely chop the bittersweet chocolate.
- Place the finely chopped chocolate in a microwave-safe bowl.
Heat the Cream Gently
- In a microwave-safe bowl or measuring cup, heat heavy cream until it's very warm and steamy, but not boiling.
- This usually takes about 1 minute in the microwave, but keep a close eye on it to avoid boil-over.
Combine & Rest
- Pour the hot cream directly over the chopped chocolate in the bowl.
- Let the mixture sit undisturbed for 3 minutes.
Whisk Until Silky Smooth
- Using a rubber spatula or whisk, slowly stir the melted chocolate and cream together in a circular motion.
- Do not whisk too vigorously as this can introduce air bubbles, which may show up as imperfections in your ganache drip.
- If a few small bits of chocolate remain, microwave the ganache in 10-second bursts, stirring after each, until fully melted and smooth.
Cool the Chocolate Ganache
- Allow the ganache to sit at room temperature for 10 to 15 minutes.
- This cools it to a thick, syrupy consistency.
- Spoon a small amount onto the side of your mixing bowl or a chilled plate.
- It should drip slowly and hold its shape as it runs.
- If it slides down too fast, it's still too warm, so let it cool for another few minutes.
Assemble Your Chocolate Strawberry Birthday Cake
- Once the cake layers are completely cool, level the tops using a serrated knife or cake leveler, if needed.
- Place the first cake on a serving plate or cake stand.
- If you have a cake turntable, use it now as it makes frosting and decorating easier and more even.
- Spoon the chilled strawberry compote onto the first cake layer and spread it out evenly.
- Make sure the compote is firm enough from chilling to hold its shape.
- Thinly slice ½ cup of strawberries lengthwise and layer them over the compote.
- Place the second cake layer on top, making sure it’s centered.
- Gently press down to secure the layers together.
Apply the Chocolate Ganache
- Pour the cooled ganache into a squeeze bottle or a piping bag fitted with a small round tip for better control.
- Starting at the top edge of the cake, gently squeeze or pipe small amounts of ganache, allowing it to naturally drip down the sides.
- Once the edges are complete, pour ganache into the center of the cake top.
- Use an offset spatula or the back of a spoon to gently spread the ganache toward the edges until it meets the drips, creating a smooth, luscious finish.
- Work quickly but carefully, as the ganache sets fast.
Finish with Strawberries and Birthday Decorations
- After applying the chocolate ganache, let it set for about 10 minutes.
- Then place fresh, clean, and well-dried strawberries on top of the cake.
- Add the “Happy Birthday” lettering (if you're using it) and birthday candles.
- Arrange the decorations thoughtfully to complete the festive look.

Nutrition Facts
Servings 12
Serving Size 1 slice (approximately 100g)
- Amount Per Serving
- Calories 413kcal
- % Daily Value *
- Total Fat 17.5g27%
- Saturated Fat 6.5g33%
- Trans Fat 0.5g
- Cholesterol 60mg20%
- Sodium 210mg9%
- Potassium 150mg5%
- Total Carbohydrate 45g15%
- Dietary Fiber 3g12%
- Sugars 30g
- Protein 5g10%
- Vitamin A 400 IU
- Vitamin C 30 mg
- Calcium 60 mg
- Iron 1.8 mg
* Percent Daily Values are based on a 2,000 calorie diet. Your daily value may be higher or lower depending on your calorie needs.
Note
- Precisely measure all ingredients, especially flour and leavening agents, for consistent results.
- Ensure eggs are at room temperature for a smooth, lump-free batter and even baking.
- Preheat the oven fully before baking, and avoid opening the oven door during the first three-quarters of the baking time to prevent the cake from sinking.
- Remove cake when a toothpick inserted comes out with moist crumbs, not completely clean, to prevent dryness.
- Cool cake layers completely on a wire rack to prevent gumminess and ensure structural integrity for assembly.
- Allow hot cream to sit over chocolate for 3 to 4 minutes before whisking to ensure proper melting and emulsification.


