This post may contain affiliate links, meaning I may earn a commission if you make a purchase, at no extra cost to you. I only recommend products I trust. Thank you for your support.
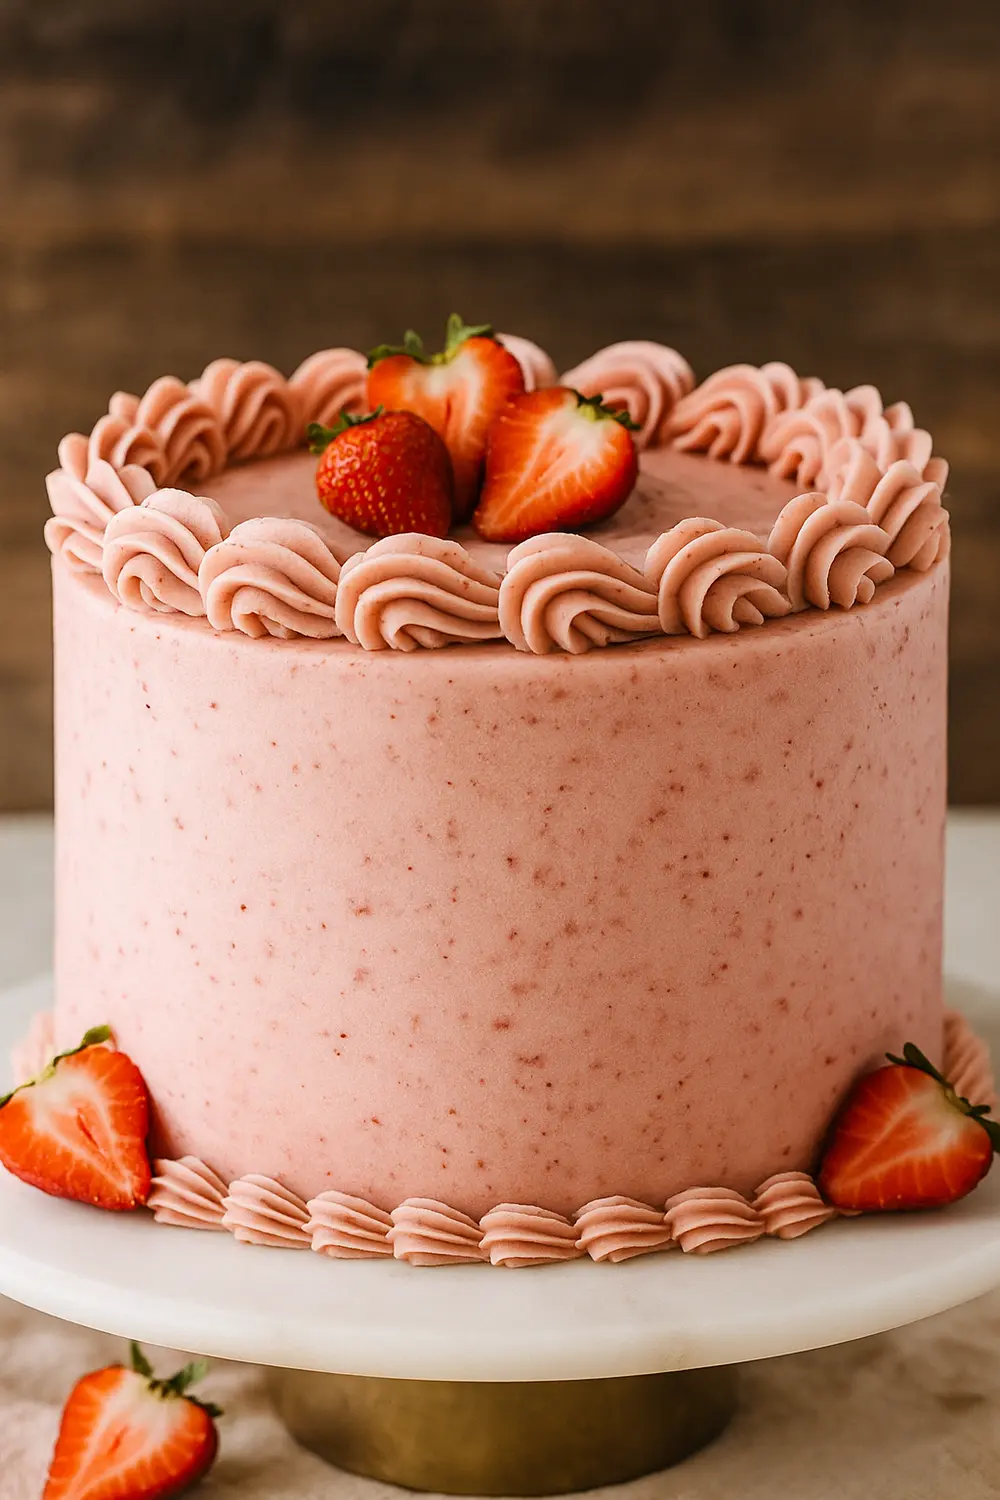
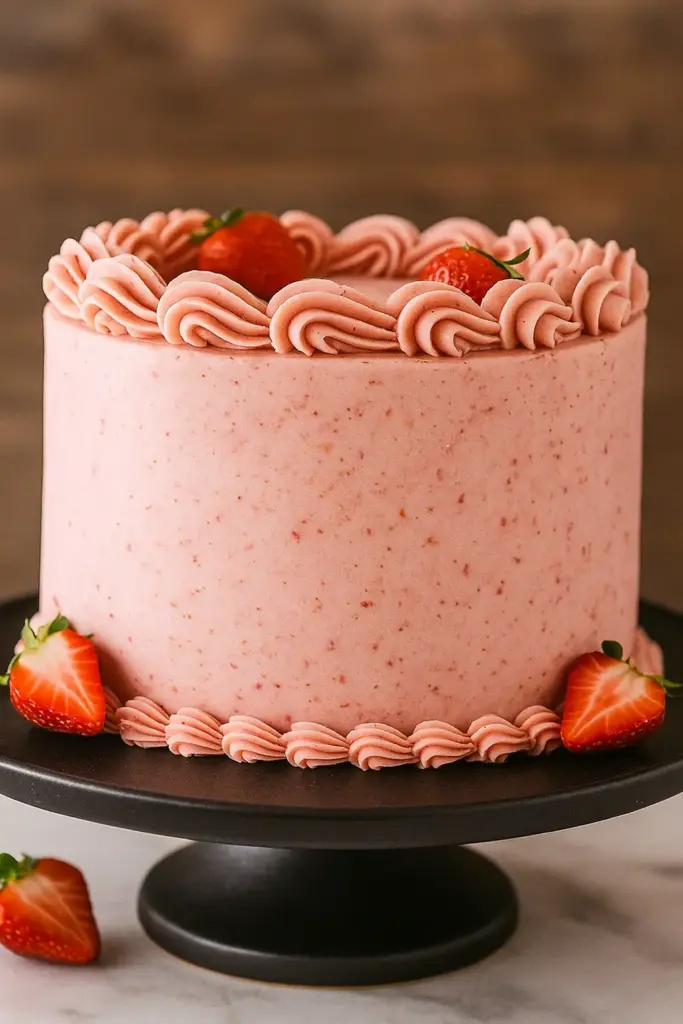
This easy homemade strawberry cake yields two beautiful 8-inch, three-layer cakes, each serving approximately 12 generous slices.
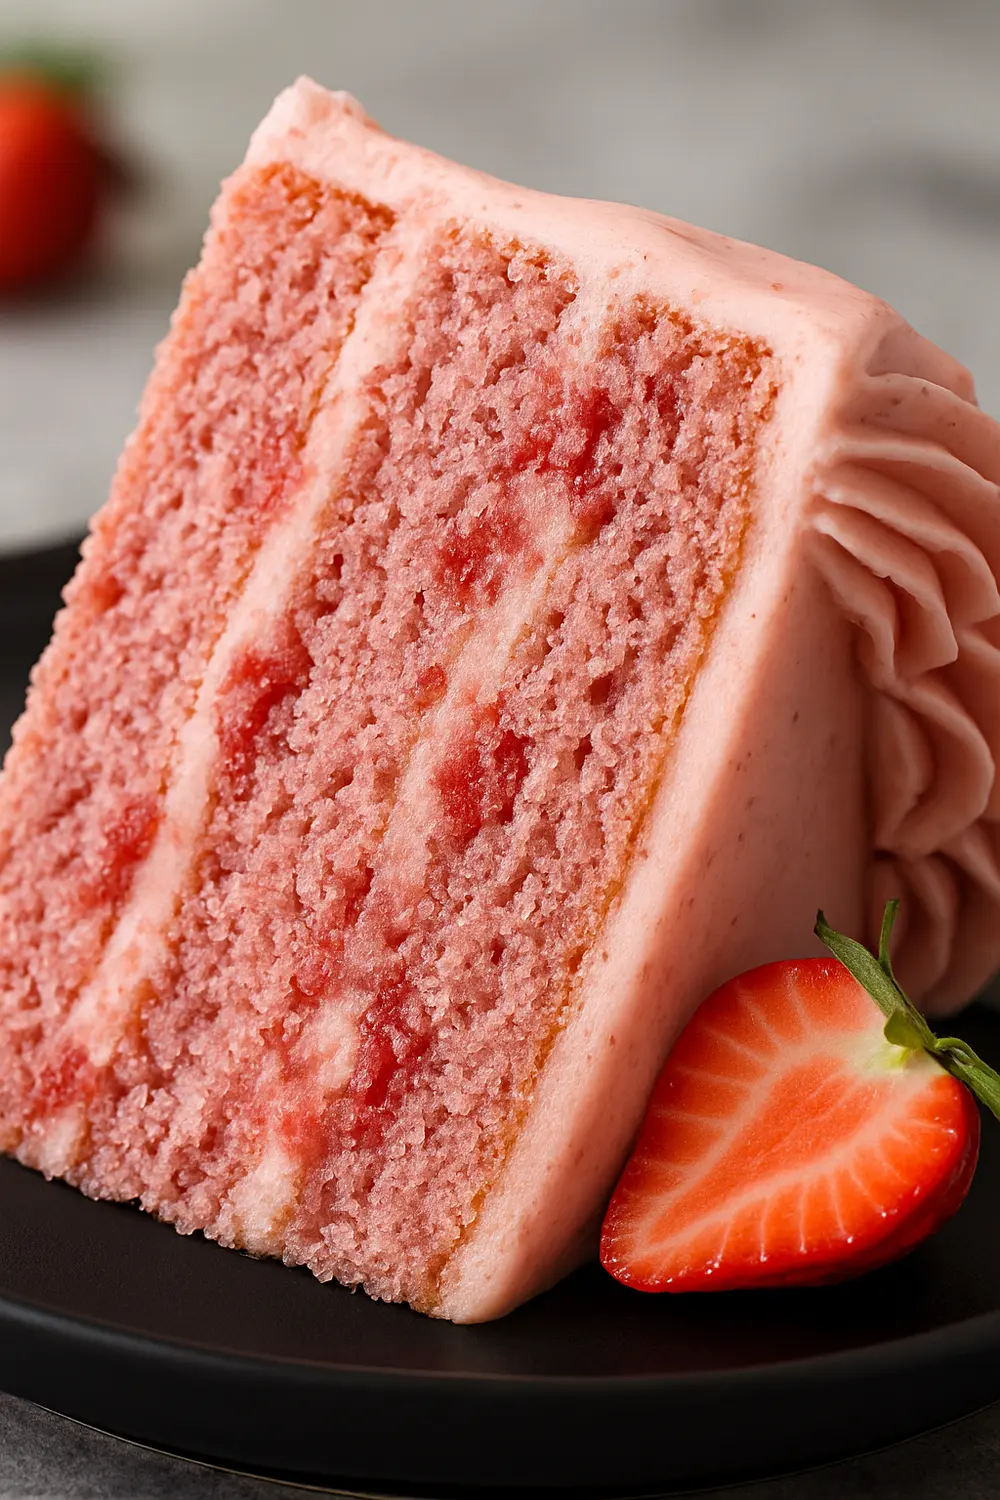
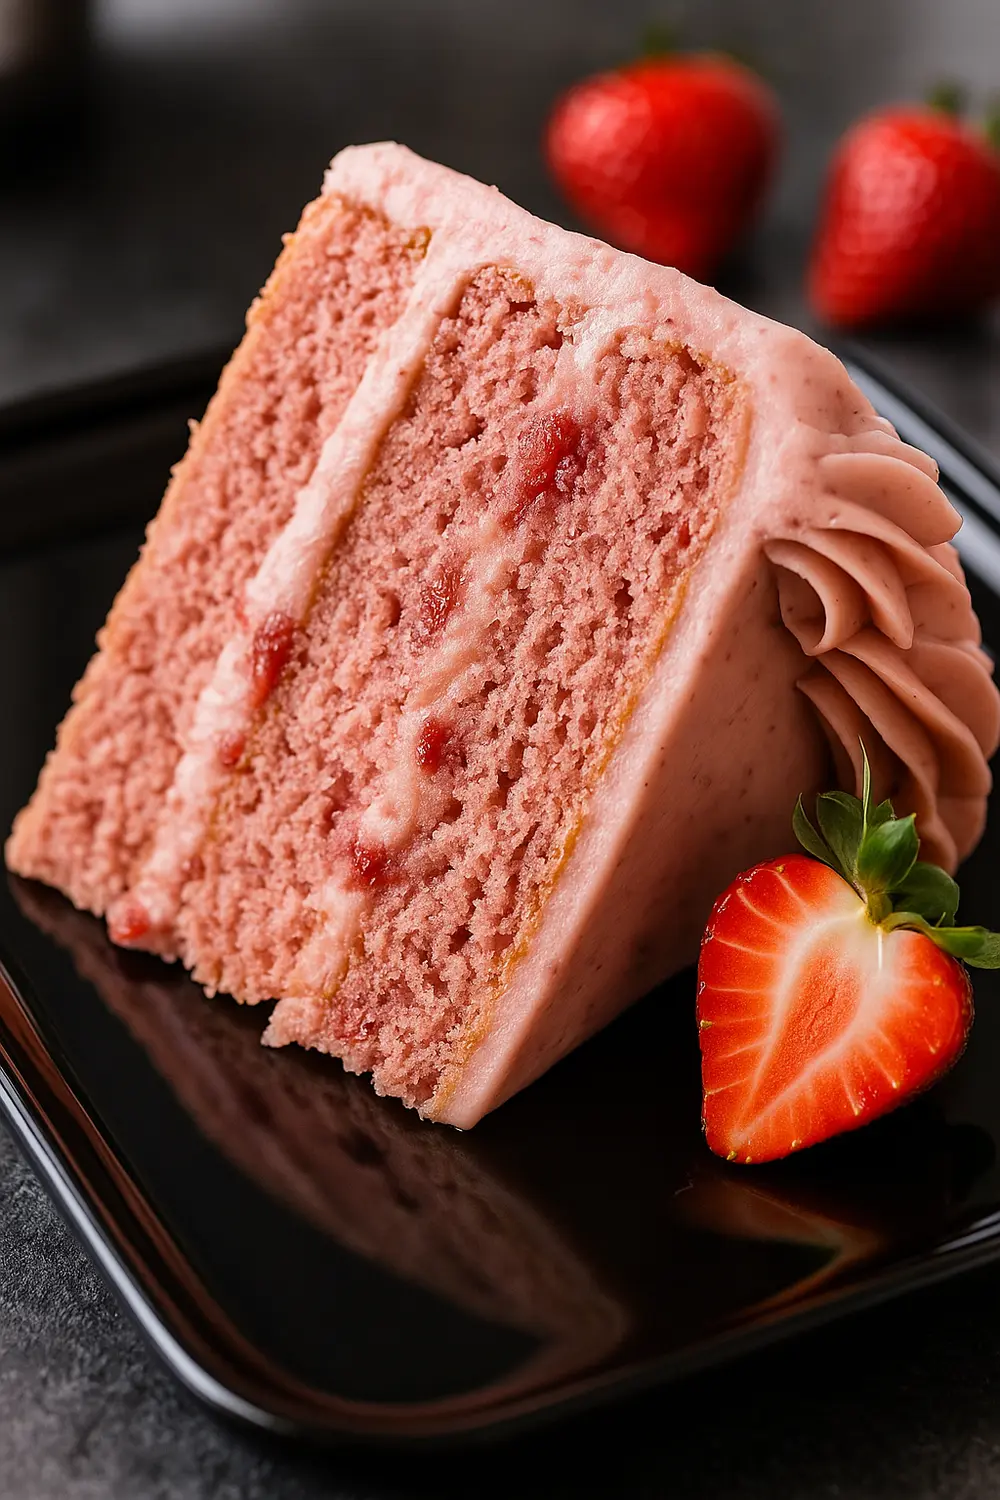
Every bite is soft and moist, bursting with fresh strawberry flavor and wrapped in the fluffiest whipped strawberry frosting.
Kids love it, adults love it, honestly, it’s just one of those cakes that makes any occasion feel extra special.
This fresh strawberry cake is perfect for a sweet weeknight treat, a holiday dessert, Christmas parties, bake sales, or anytime you want to share something homemade and beautiful.
The best part? This particular strawberry cake is simple to make. You’ll need about 30 minutes to prep, 35 to bake, and just 15 to stack and frost.
No shortcuts or box mixes, just real, homemade strawberry cake made from scratch. One taste and you’ll never look at store-bought cakes the same way.
Our strawberry cake needs just three cups of fresh berries to pack the cake and frosting with a bright, natural strawberry flavor, without making it heavy or soggy.
We use real butter and full-fat cream cheese to make sure the frosting stays light, stable, and rich, plus a bit of sour cream to keep the cake extra moist and tender without turning the crumb heavy or gummy.
✅ Read the entire article to ensure you’re fully prepared with all the necessary equipment and ingredients. The full recipe and cooking instructions are below.
Homemade Strawberry Cake Ingredients List
Every great recipe has its heroes, and in our homemade strawberry cake recipe, these ingredients play pivotal roles in delivering that authentic, vibrant strawberry flavor and perfect texture:
1. Fresh Strawberries (for the Reduction)
- This is the absolute cornerstone of our strawberry cake’s flavor.
- Instead of relying solely on extracts, we create a concentrated strawberry reduction by simmering fresh berries with sugar, lemon zest, and lemon juice.
- This process intensifies their natural sweetness and tang, ensuring a deep, authentic berry taste throughout the cake layers and filling.
2. Freeze-Dried Strawberries (for the Frosting)
- While fresh strawberries are fantastic for the cake, freeze-dried strawberries are a game-changer for the frosting.
- When processed into a fine powder, they infuse the cream cheese frosting with an incredibly potent, pure strawberry flavor without adding any excess moisture.
- This prevents the frosting from becoming runny and allows for a rich, concentrated berry taste that truly shines.
3. Unsalted Butter & Unflavored Vegetable Oil
- This dynamic duo in the cake batter provides the perfect balance of richness and moisture.
- Butter contributes to the cake’s delicious flavor and tender crumb, while the vegetable oil ensures a consistently moist texture that stays soft even after refrigeration.
4. Egg Whites
- We deliberately use only egg whites instead of whole eggs to create a classic “white cake” base to keep the crumb lighter and let the fresh strawberry color and flavor shine through beautifully.
5. Full-Fat Cream Cheese (Cold and Firm)
- For our dreamy strawberry cream cheese frosting, the quality and temperature of the cream cheese are critical.
- Using cold, firm, full-fat cream cheese and whipping it smooth before adding the butter is key to achieving a stable, creamy, and pipeable frosting that holds its shape beautifully.
6. Cornstarch (in Cake Batter)
- A subtle but important addition, cornstarch mixed with the all-purpose flour helps to tenderize the cake’s crumb.
- It mimics the lower protein content of cake flour, contributing to a softer, more delicate texture in the finished cake.
7. Lemon Zest and Fresh Lemon Juice
- These aren’t just for the reduction; they are flavor enhancers.
- The acidity and bright citrus notes from the lemon cut through the sweetness and elevate the natural fruitiness of the strawberries, making the overall flavor profile more complex and vibrant.
Equipment You’ll Need for Your Baking Your Homemade Strawberry Cake
Here is a list of kitchen tools that will be needed to create this strawberry cake masterpiece:
- 2 (8-inch) Round Cake Pans: These are fundamental for shaping the cake layers, ensuring uniform baking, and facilitating easy assembly.
- Parchment Paper: Lining the bottom of the cake pans with parchment paper is crucial for preventing the cake from sticking.
- Large Saucepan: This is necessary for creating the vital strawberry reduction. A large saucepan provides ample space for the berries to simmer and allows for efficient mashing, ensuring the reduction process is smooth and controlled.
- Food Processor or Blender: This tool is indispensable for efficiently pureeing fresh or frozen strawberries for the reduction, and transforms freeze-dried strawberries into a fine powder for the frosting.
- Fine-Mesh Sieve: Sifting dry ingredients through a fine-mesh sieve aerates the flour, preventing lumps and contributing significantly to a lighter, more tender cake crumb, a hallmark of a well-made strawberry cake.
- Stand Mixer with Paddle Attachment or Electric Hand Mixer with Large Mixing Bowls: These are crucial for creaming butter and sugar effectively, a process that incorporates air into the mixture and creates a light, fluffy texture.
- Rubber Spatula: Most importantly, it is used for gently folding ingredients, a technique which is key to preventing overmixing and maintaining a tender crumb in the cake batter.
- Wire Rack: A wire rack allows air to circulate on all sides of the cake, preventing condensation from forming on the bottom, which could lead to a soggy texture.
- Serrated Knife: This type of knife is ideal for leveling cake layers that dome during baking, ensuring a flat, stable surface for stacking. This is vital for a professional-looking and structurally sound layer cake.
- Offset Spatula or Icing Spatula: These tools are designed for spreading frosting smoothly and evenly across the strawberry cake layers and sides.
- Piping Bag with 1A Round Tip: For those desiring a more refined presentation, a piping bag with a round tip allows for creating a precise frosting dam to contain the filling and for elegant decorative touches on the cake’s surface.
- Cake Scraper: This tool is used for achieving perfectly smooth and sharp sides on a frosted cake, which elevates the strawberry cake’s presentation, giving it a professional bakery-quality appearance.
Tips for Making the Best Ever Strawberry Cake
Here are some essential tips to ensure this homemade strawberry cake turns out perfectly every time, embodying the care and precision of a culinary expert:
1. Temperature of Ingredients is Paramount
- The temperature of ingredients significantly impacts the final texture of baked goods.
- For the cake batter, it is crucial that all cold ingredients, such as butter, eggs, and milk, are at proper room temperature.
- This state is vital for proper emulsification during the creaming process, which creates a smooth, well-aerated batter and ultimately contributes to a tender cake crumb.
2. Use Ripe Berries for Potent Flavor
- The foundation of an intensely flavored strawberry cake begins with the fruit itself. Always select the ripest, most fragrant strawberries available.
- A simple “smell test” at the supermarket, where a bright berry scent can be detected through the packaging, is a good indicator of juicy, sweet, and flavorful berries.
3. The Non-Negotiable Strawberry Reduction
- The strawberry reduction step is not merely an option; it is fundamental for achieving an intense, natural strawberry flavor throughout the cake.
- This process involves simmering the berries down until the mixture is thick and concentrated.
- This concentration is where the true, authentic strawberry flavor is developed, and it simultaneously removes excess liquid that would otherwise dilute the batter and negatively affect its consistency.
4. Embrace the Food Coloring
- While the strawberry reduction provides natural color, the baking process often causes this natural hue to fade, resulting in a dull appearance.
- To achieve the vibrant, appetizing pink color that matches the cake’s incredible flavor and makes it visually stunning, a few drops of red or pink gel food coloring are highly recommended.
5. Avoid Overmixing the Batter
- Once the dry ingredients are added to the wet mixture, it is crucial to mix the cake batter just until the ingredients are combined and no streaks of flour are visible.
- Overmixing at this stage will overdevelop the gluten in the flour, leading to a tough, dense, and chewy cake rather than the desired soft and tender texture.
6. Use Cold, Firm Cream Cheese for Frosting
- To create a stable, pipeable cream cheese frosting that holds its form, it is essential to start with cold cream cheese.
- Whip the cold cream cheese until it is completely smooth before adding the room temperature butter.
- This technique helps prevent the frosting from becoming runny or unstable, which would make it difficult to spread and decorate the cake effectively.
7. Cool Cakes Completely
- It is essential to ensure that the cake layers are completely cool before attempting to apply any frosting.
- Attempting to frost warm cakes will inevitably cause the frosting to melt, leading to a messy, sliding situation and a compromised presentation.
8. Consider a Simple Syrup Brush:
- For an additional layer of moisture and an amplified strawberry presence, a simple syrup can be brushed onto the cooled cake layers.
- Gently prick the surface of the cooled cake layers all over with a toothpick, then brush them with a simple strawberry syrup.
- This syrup can be made by simmering equal parts sugar and water until dissolved, with a touch of strawberry jam or liqueur added for flavor.
Best Strawberry Cake Topping Ideas
While our strawberry cream cheese frosting is a star in itself, here are some fantastic topping ideas to elevate your homemade strawberry cake, adding visual appeal and complementary flavors:
- Fresh Sliced Strawberries: This is a classic for a reason! Arranging fresh, vibrant strawberry slices on top of the cake adds a beautiful, natural garnish and a burst of fresh fruit flavor and texture that perfectly complements the strawberry cake’s theme.
- Piped Frosting Borders: Use any leftover strawberry cream cheese frosting to pipe elegant decorative borders or swirls on top of the cake.
- Whipped Cream: For a lighter, airier topping, a dollop of freshly whipped cream can be a delightful alternative or addition to the cream cheese frosting.
- Dark Chocolate Drizzle or Shavings: If you love the classic chocolate-covered strawberry combination, a drizzle of melted dark chocolate or a scattering of dark chocolate shavings can add a sophisticated touch.
- White Chocolate Buttercream: For a different kind of sweetness, a white chocolate buttercream could be a lovely pairing, offering a creamy, subtly sweet flavor that harmonizes well with the berries.
Final Remarks
This homemade strawberry cake recipe is a masterclass in balancing flavor, texture, and presentation.
It moves beyond simply combining ingredients, delving into techniques that elevate a good cake to a truly exceptional one.
This homemade strawberry cake dessert is truly the best strawberry cake recipe for a fresh strawberry cake that everyone will adore.
So, tie on your apron, gather your ingredients, and let’s bake this magic together.
Happy baking!
The Best Homemade Strawberry Cake Ever
This oven-baked homemade strawberry cake recipe yields a moist, tender crumb bursting with natural strawberry flavor, complemented by a rich, creamy strawberry cream cheese frosting.
Ingredients
For the Strawberry Reduction
For the Strawberry Cake Layers
For the Strawberry Cream Cheese Frosting
Step-by-Step Instructions
Prepare Strawberry Reduction
Prepare the Berries
- Begin by thoroughly washing and hulling the fresh strawberries.
- If the strawberries are large, halving them will ensure they cook more evenly and break down efficiently during the reduction process.
Simmer for Flavour
- In a large saucepan, combine the prepared strawberries with the granulated sugar, lemon zest, and fresh lemon juice.
- The addition of lemon zest and juice serves a dual purpose: it brightens the inherent strawberry flavor, preventing it from becoming flat or overly sweet, and it also aids in the pectin release from the fruit, contributing to the thickening process.
- Place the pan over medium heat and bring the mixture to a gentle simmer.
- Stir occasionally to prevent sticking and ensure even cooking.
- Allow it to cook for approximately 10 minutes, during which the strawberries will soften and begin to release their vibrant juices.
Mash and Reduce
- Once the strawberries are soft, use a potato masher to thoroughly mash them directly in the pan.
- This action helps to break down the fruit fibers, releasing more flavor compounds and creating a more uniform consistency for the reduction.
- Continue to simmer the mashed strawberries over medium heat for an additional 10 minutes, stirring periodically.
- During this phase, the mixture will visibly thicken as excess water evaporates, leading to a more concentrated and intense strawberry flavor.
- This concentration is essential for a potent berry presence in the final cake.
Thicken with Cornstarch
- In a separate small bowl, whisk together the cornstarch and 2 tablespoons of water until a smooth, lump-free slurry is formed.
- Pour this slurry into the simmering strawberry mixture while continuously stirring.
- Constant stirring is crucial at this point to prevent lumps from forming and to ensure the cornstarch is evenly distributed, allowing it to thicken the reduction beautifully to a jam-like consistency.
- This prevents the reduction from making the cake batter too wet later on.
Final Reduction
- Continue to cook the mixture for a few more minutes, stirring constantly, until it becomes thick and glossy.
- The target consistency is a rich, spoonable jam.
- The yield should be approximately 2 cups of this luscious strawberry filling.
- If the mixture appears too watery, continue to reduce it further until the desired thickness is achieved.
Cool Completely
- This step is crucial for the success of the cake.
- Transfer the hot strawberry reduction to a wide, shallow dish or plate.
- Spreading it out maximizes the surface area, which significantly speeds up the cooling process.
- Refrigerate the dish for at least 30 minutes, or until the reduction is completely cool.
- Preparing this reduction a day in advance is an excellent strategy to save time and ensure it is perfectly chilled when needed.
Bake the Cake Layers
Preheat and Prepare Pans
- Begin by preheating the oven.
- If the oven has a fan (convection setting), set it to 320°F (160°C).
- For ovens without a fan, increase the temperature to 347°F (175°C) to compensate for potentially less even heat distribution.
- Next, prepare two 8-inch round cake tins.
- This involves thoroughly greasing them and then lining the bottoms with parchment paper.
- A light application of homemade cake release on the sides of the pans can further ensure effortless removal of the baked strawberry cakes.
Combine Dry Ingredients
- In a medium bowl, combine the all-purpose flour, cornstarch, baking powder, and salt.
- Sifting these dry ingredients together is highly recommended as it aerates the mixture, preventing lumps and contributing to a smoother batter and ultimately a lighter cake texture.
- Whisk them thoroughly with a fork to ensure all components are well combined and evenly distributed before they are added to the wet ingredients.
- Set this mixture aside.
Prepare Wet Flavor Mix
- In a separate small bowl, combine ¾ cup (195g) of the now-cooled strawberry reduction, the room temperature whole milk, strawberry essence/extract, vanilla essence/extract, and white vinegar.
- Mix these ingredients well until they are fully incorporated.
- The white vinegar reacts with the baking soda in the dry ingredients, contributing to the cake's lift and tenderness.
- If a more vibrant pink color is desired for the cake layers, a color that will largely retain its intensity through baking, add 1-2 drops of red gel food coloring at this stage.
Cream Fats and Sugar
- In the bowl of a stand mixer fitted with the paddle attachment, or a large mixing bowl with an electric hand mixer, combine the room temperature unsalted butter, unflavored vegetable oil, and white granulated sugar.
- Beat these ingredients on medium-high speed for approximately 3 minutes, or until the mixture becomes light, pale, and notably creamy.
- This creaming process is fundamental as it incorporates air into the fats and sugar, creating tiny pockets that will expand during baking, resulting in a light and airy cake texture.
- This step should not be rushed, as its thoroughness directly impacts the cake's final crumb.
Add Egg Whites
- With the mixer speed reduced to low-medium, add the room temperature egg whites in 3 separate batches.
- Mix for about 10-15 seconds after each addition, just until they are combined.
- It is important to scrape down the sides of the bowl as needed to ensure all ingredients are evenly incorporated into the mixture.
Incorporate Wet & Dry (Carefully!)
- Reduce the mixer speed to low.
- Add half of the prepared wet flavor mix (the strawberry reduction, milk, extracts, and vinegar mixture) to the creamed butter and egg white mixture, mixing just until combined.
- Then, critically, switch to a rubber spatula and, by hand, gently fold in half of the dry ingredients (the flour mixture) until just combined.
- The emphasis here is on avoiding overmixing.
- Excessive mixing at this stage can overdevelop the gluten in the flour, leading to a tough, dense, and chewy cake rather than a tender one.
Repeat and Finish
- Add the remaining wet flavor mix and continue to fold gently until just combined.
- Finally, fold in the remaining dry ingredients until they are just incorporated and no streaks of flour are visible.
- If the batter's color appears dull, an additional drop of red gel food coloring can be added and gently folded in to achieve a more vibrant hue.
Fill and Bake
- Divide the cake batter evenly between the two prepared 8-inch cake tins.
- Use an offset spatula to gently spread the batter into an even layer in each pan, ensuring uniform thickness for even baking.
- Place the pans on the center rack of the preheated oven and bake for approximately 35 minutes, or until a wooden skewer or toothpick inserted into the center of the cake comes out clean, indicating it is fully baked.
Allow to Cool
- Once baked, immediately remove the strawberry cakes from the oven and place them, still in their tins, on a wire rack to cool for 15-20 minutes.
- This initial cooling period within the pans allows the delicate cake structure to firm up and prevents it from breaking or crumbling when inverted.
- After this initial cooling, carefully invert the cakes from their pans onto the wire rack, remove the pans, and gently peel off the parchment paper.
- It is essential to let the cake layers cool completely on the wire rack before attempting to frost them.
- This can take an hour or more.
- Attempting to frost warm cakes will cause the frosting to melt and slide off, compromising both the appearance and stability of the final strawberry cake.
Prepare the Strawberry Cream Cheese Frosting
Powder Freeze-Dried Strawberries
- Begin by processing the freeze-dried strawberries in a food processor or a spice grinder until they form a very fine, powdery crumb.
- This method is superior for incorporating concentrated strawberry flavor into frosting without introducing excess moisture, which can destabilize buttercream.
- This process should yield approximately ½ cup of strawberry powder.
- Set this aside for later use.
Whip Cream Cheese
- In the bowl of a stand mixer fitted with the paddle attachment, or a large mixing bowl with an electric hand mixer, add the cold, firm full-fat cream cheese.
- The cream cheese must be cold and firm, not softened, to achieve the desired stability in the frosting.
- Whip the cream cheese on high speed for about 1 minute until it becomes completely smooth and creamy, with no lumps remaining.
- This initial whipping of cold cream cheese is vital for creating a stable, pipeable frosting that will hold its shape beautifully.
Cream Butter
- Add the room temperature unsalted butter to the whipped cream cheese.
- Beat the mixture on medium-high speed until it is light, fluffy, and thoroughly combined.
- Periodically scrape down the sides of the bowl to ensure all ingredients are evenly incorporated and no pockets of unmixed butter or cream cheese remain.
Add Sweetness and Flavor
- Reduce the mixer speed to low.
- Gradually add the sifted icing sugar in three batches, ensuring that each batch is fully mixed into the butter-cream cheese mixture before the next addition.
- This gradual incorporation prevents a cloud of sugar from forming and ensures a smooth consistency.
- After the icing sugar, add the powdered freeze-dried strawberries, strawberry essence/extract, vanilla essence/extract, and salt.
Achieve Creamy Perfection
- Increase the mixer speed to medium-high and beat the mixture until the frosting is completely smooth, creamy, and visibly lightened in color and texture.
- If the frosting appears too thick for easy spreading or piping, add whole milk, a teaspoon or two at a time, beating after each addition until the desired spreadable consistency is achieved.
- This careful adjustment ensures the frosting is both stable and easy to work with.
Assemble Your Strawberry Cake
Level Your Layers
- For a professional and structurally stable strawberry cake, it is highly recommended to level the cake layers if their tops have domed during baking.
- Use a serrated knife to carefully trim the tops flat.
- This creates an even surface for stacking, preventing the cake from leaning.
- Additionally, any caramelized edges can be trimmed for a softer, more uniform bite throughout the cake.
First Layer & Frosting Dam
- Place one of the completely cooled cake layers onto the chosen serving plate or cake stand.
- Spread a generous amount of the strawberry cream cheese frosting, approximately 1 cup, evenly over the top of this layer, extending it almost to the very edge.
Pipe the Filling Dam
- If the cake is to include an extra layer of strawberry filling, now is the time to create a "dam" with the frosting.
- Transfer some of the prepared frosting into a piping bag fitted with a 1A round tip.
- Pipe a continuous border, or even a double border for enhanced height and security, around the very perimeter of the frosted cake layer.
- This dam is crucial as it will securely hold the delicious strawberry filling in place, preventing it from oozing out when the cake is sliced.
Add the Strawberry Filling
- Carefully fill the center of the frosting dam with the remaining strawberry reduction prepared earlier.
- Spread it evenly within the confines of the dam, ensuring it is level with the piped border.
- This creates a delightful burst of concentrated strawberry flavor and moisture in the center of the cake.
Second Layer & Crumb Coat
- Gently place the second cooled cake layer directly on top of the first, aligning it as precisely as possible.
- Press down very gently to secure it.
- Next, apply a very thin, even layer of frosting over the entire top and sides of the cake.
- This is known as the "crumb coat."
- Its purpose is to act as a primer, effectively trapping any loose crumbs and sealing them into this initial layer, thereby ensuring that the final, decorative frosting layer remains smooth and pristine.
- After applying the crumb coat, chill the cake in the refrigerator for 15-20 minutes to allow this layer to set firmly.
Final Frosting & Decorate
- Once the crumb coat is set and firm to the touch, apply the remaining strawberry cream cheese frosting generously to the top and sides of the cake.
- Use an offset spatula or a cake scraper to smooth the sides and top.
- A cake scraper, in particular, can help achieve a polished, professional bakery-quality finish.
Garnish
- For the final flourish, pipe a decorative border on top of the cake with any leftover buttercream, using the same 1A tip if available.
- Then, artfully arrange fresh, sliced strawberries on top.
Serve & Store
- Your magnificent homemade strawberry cake is now ready to be sliced and served.
- For any leftover cake, ensure it is tightly covered and stored in the refrigerator, where it will remain fresh for up to 5-6 days.
Nutrition Facts
Servings 12
Serving Size (approximately 238.1 grams)
- Amount Per Serving
- Calories 642.9kcal
- % Daily Value *
- Total Fat 28.6g44%
- Saturated Fat 11.9g60%
- Cholesterol 83.3mg28%
- Sodium 523.8mg22%
- Potassium 285.7mg9%
- Total Carbohydrate 85.7g29%
- Dietary Fiber 2.4g10%
- Sugars 57.1g
- Protein 7.1g15%
- Vitamin A 600 IU
- Vitamin C 20 mg
- Calcium 142.9 mg
- Iron 2.9 mg
* Percent Daily Values are based on a 2,000 calorie diet. Your daily value may be higher or lower depending on your calorie needs.
Note
- For the cake batter, butter, eggs, and milk must be at room temperature for proper emulsification and a smooth batter.
- For the frosting, start with cold cream cheese, whip it smooth, then add room temperature butter for stability.
- Once dry ingredients are added, mix only until just combined and no streaks of flour remain.
- Always cool cake layers completely before frosting; if they’re warm, the frosting will melt and slide off, ruining the cake’s look and stability.
- Natural strawberry color fades during baking. A few drops of red or pink gel food coloring will ensure the cake has an appealing, vibrant hue.
- If including a strawberry filling between layers, pipe a border of frosting around the edge of the layer to contain the filling and prevent it from oozing out when sliced.




I love it, thanks.